撸了一天blog,有点嫌弃这个部署效率,都3202年了,居然还要我去服务器上运行个部署脚本,自动化搞上 顺便让我水一篇
老惯例,先让工具人说两句。
GitHub Actions 是 GitHub 提供的一项持续集成/持续部署(CI/CD)服务,可让开发者自动化软件工作流程。通过在存储库中编写和组织一系列任务(例如编译代码、运行测试、构建应用程序、部署到服务器等),GitHub Actions 可以在存储库发生特定事件时(例如推送代码、创建拉取请求、发布新版本等)自动执行这些任务,以加快开发者的开发流程。
以下是一些 GitHub Actions 的特点和优点:
· 集成在 GitHub 平台中,可方便使用,不需要额外的注册和配置。
· 支持多种编程语言和框架,如 JavaScript、Python、Java、Ruby、Docker 等。
· 支持定时任务、事件触发任务等多种触发方式。
· 支持在多个操作系统和环境中执行任务。
· 可以使用预定义的操作,例如构建、测试、部署等,也可以编写自定义的操作。
· 提供了丰富的日志和报告,以方便开发者监控任务执行情况。
使用 GitHub Actions,开发者可以通过自动化流程,快速、高效地构建、测试和部署应用程序,从而提高开发效率和质量。
好,鼓掌👏👏👏。下面还是实战记录讲解下配置流程。
Task: 自动化blog部署
目前github-actions有很多配置项,详细请参考官方文档。
github会提供机器用于actions,但是需要收费,而且咱的静态资源在服务器上,图方便肯定是在服务器上打包,对于自托管的运行器,gitHub有相应的说明。比如自托管运行器与 GitHub Actions 未连接超过 14 天,将被自动从 GitHub 中删除等等的一些规范。
添加自托管的运行器到仓库
在repo页面,单击 “设置”,左侧栏找到Actions/Runners,根据服务器的类型选下可以看到部署脚本,下面解释脚本的意思,建议不要复制下面的脚本使用,以防脚本更新,主要还是按照github提供的脚本来。
1
2
3
4
5
6
7
8
9
10
|
mkdir actions-runner && cd actions-runner
curl -o actions-runner-linux-x64-2.301.1.tar.gz -L https://github.com/actions/runner/releases/download/v2.301.1/actions-runner-linux-x64-2.301.1.tar.gz
echo "3ee9c3b83de642f919912e0594ee2601835518827da785d034c1163f8efdf907 actions-runner-linux-x64-2.301.1.tar.gz" | shasum -a 256 -c
tar xzf ./actions-runner-linux-x64-2.301.1.tar.gz
RUNNER_ALLOW_RUNASROOT="1" ./config.sh --url {替换你的url} --token {替换你的token}
|
如果上一步出现了什么missing依赖的执行sudo ./bin/installdependencies.sh,具体的报错里会有提示什么叫专业,看看人家做的脚本多么银杏。执行完显示
1
2
3
4
5
6
7
8
9
10
| --------------------------------------------------------------------------------
| ____ _ _ _ _ _ _ _ _ |
| / ___(_) |_| | | |_ _| |__ / \ ___| |_(_) ___ _ __ ___ |
| | | _| | __| |_| | | | | '_ \ / _ \ / __| __| |/ _ \| '_ \/ __| |
| | |_| | | |_| _ | |_| | |_) | / ___ \ (__| |_| | (_) | | | \__ \ |
| \____|_|\__|_| |_|\__,_|_.__/ /_/ \_\___|\__|_|\___/|_| |_|___/ |
| |
| Self-hosted runner registration |
| |
--------------------------------------------------------------------------------
|
之后是配置runner的信息,一路回车到结束。刷新下github的runner页面,这时已经能看到刚刚添加的runner了。
最后一步让你./run.sh,这肯定不行啊。艹,上面做的那么好,最后拉了裤以linux为例,写个守护进程
1
2
3
4
5
6
7
8
9
10
11
12
13
14
15
16
17
18
19
20
| vi /etc/systemd/system/actions-runner.service
[Unit]
Description=actions-runner
After=network.target
[Service]
Type=simple
Restart=always
User=root
Environment=RUNNER_ALLOW_RUNASROOT=1
ExecStart=/bin/bash /root/github/actions-runner/run.sh
[Install]
WantedBy=multi-user.target
|
保存service后,添加到开机启动
1
| systemctl enable actions-runner.service
|
启动
1
| systemctl start actions-runner.service
|
查看状态
1
| systemctl status actions-runner.service
|
看到active是running就搞定了
1
2
3
4
5
6
7
8
9
10
11
12
13
| ● actions-runner.service - actions-runner
Loaded: loaded (/etc/systemd/system/actions-runner.service; disabled; vendor preset: disabled)
Active: active (running) since Mon 2023-02-20 15:03:34 CST; 2s ago
Main PID: 13705 (bash)
Tasks: 18
Memory: 32.4M
CGroup: /system.slice/actions-runner.service
├─13705 /bin/bash /root/github/actions-runner/run.sh
├─13710 /bin/bash /root/github/actions-runner/run-helper.sh
└─13715 /root/github/actions-runner/bin/Runner.Listener run
Feb 20 15:03:34 fine-idea-1.localdomain systemd[1]: Started actions-runner.
Feb 20 15:03:36 fine-idea-1.localdomain bash[13705]: √ Connected to GitHub
|
wrokflow编写
刚刚配置完,刷新下github的runner页面,可见服务器的状态变成Idle了。下面就开始搞workflow,可以在github上查看具体参数。
下面是我的workflow,比较简单
1
2
3
4
5
6
7
8
9
10
11
12
13
14
15
16
17
18
19
20
21
| name: deploy this blog
run-name: ${{ github.actor }} is deploying 🚀
on:
push:
tags:
- v*
jobs:
deploy:
runs-on: self-hosted
defaults:
run:
working-directory: /root/github/HumbleShack
steps:
- name: Check out repository code
run: git pull
- name: Install dependencies
run: yarn
shell: bash
- name: rebuild all static resource
run: npx hexo clean && yarn build
shell: bash
|
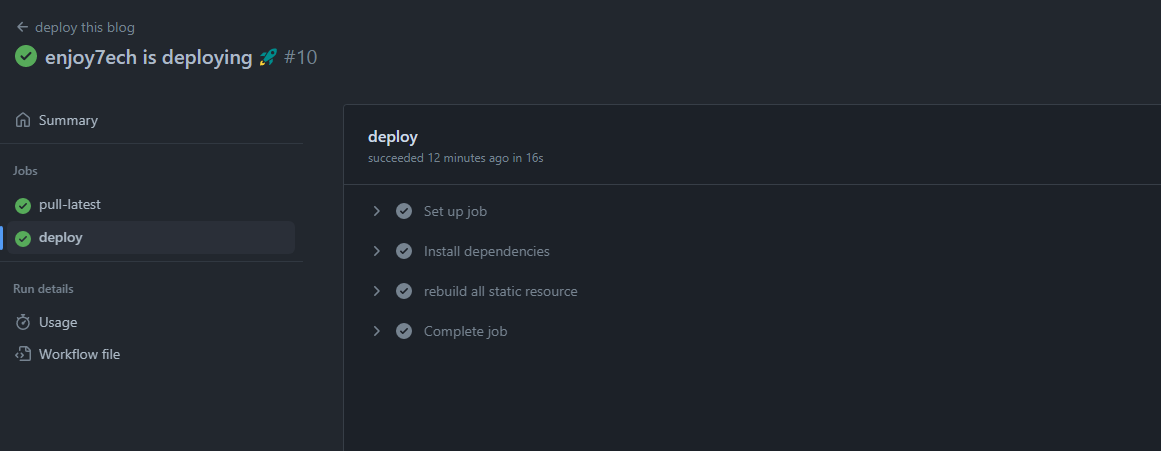
配置完push代码,本地修改完直接打个tag,推到github触发workflow。兴奋的抓手手
1
| git tag v1.0.0 && git push origin v1.0.0
|
到actions页面也是能看到执行日志,大功告成。